Monday, June 26, 2017

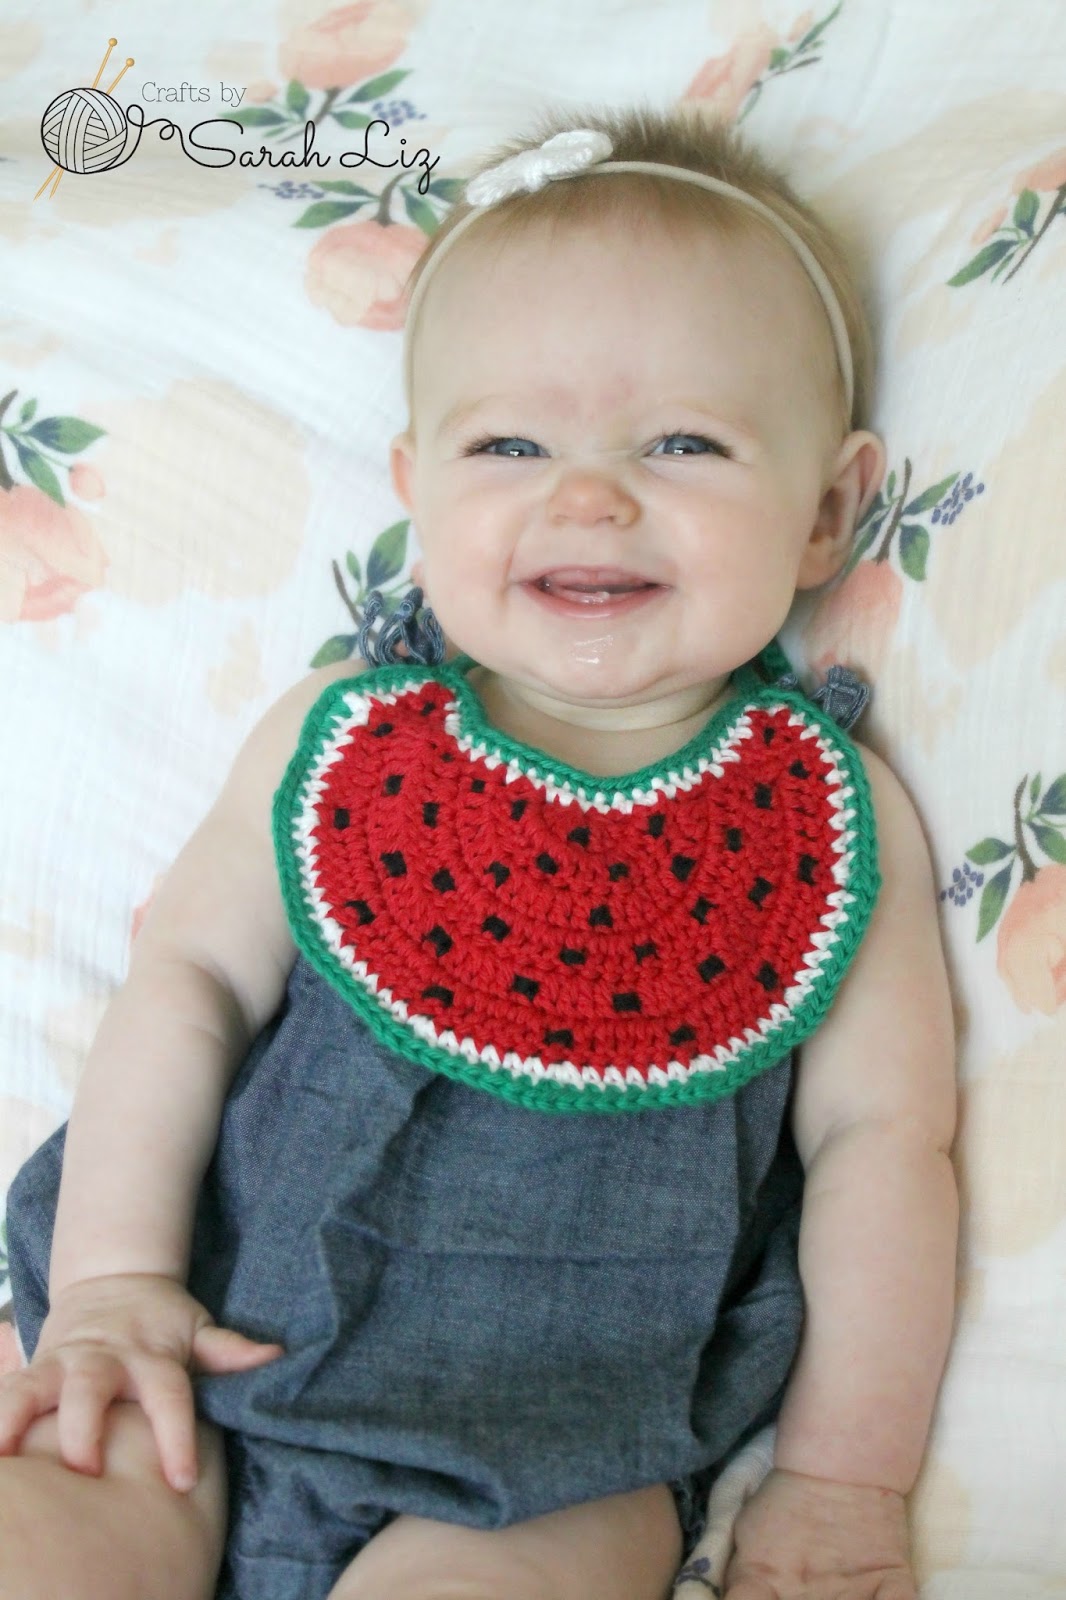
Watermelon Baby Bib

I was inspired by the summer weather to make this watermelon baby bib. It works up quickly to help catch all that baby drool.


The crochet pattern is now available on my Ravelry store or Etsy shop. 
Here are some details of what is included in the purchase of the pattern:

Size:
Based on the tightness of my tension, the dimensions of the finished bib are approximately 6 inches wide and 4 inches long (not including ties). Feel free to go up or down hook sizes to adjust the size of the bib.
Materials:
G hook (4mm)
Worsted Weight Cotton Yarn (I used Hobby Lobby I Love This Cotton Yarn) in Red, White, Green, and Black.Large eye needle for weaving in ends Abbreviations:Ch - chainSc - single crochetDc - double crochetSl st - slip stitchSc decrease – single crochet decrease (single crochet 2 together)RS – right sideWS – wrong side

Pattern will include:Written instructions in English. Photos showing the steps of the pattern. 8 Page PDF file.


I would love to see your watermelon bibs! Tag me on instagram @craftsbysarahliz so I can see your work!

*Permissions*
- You are free to sell what you make from this pattern. I would appreciate links back to my blog to credit me as the designer.
- You may not use my photos
- You may not sell this pattern or claim it as your own

© Sarah Gross - Crafts by Sarah Liz
Monday, June 19, 2017

Shortcut Spaghetti Sauce

Last month I shared my Easy Cheaty Stroganoff recipe. Another "cheat" recipe of mine is my spaghetti sauce. For special occasions I might do a sauce entirely from scratch. But for a normal evening at my house I am usually wrangling a rowdy 4 1/2 year old, a mischievous 2 year old, and a clingy 8 month old. As you might imagine, my time is not always my own. Little shortcuts save my life. Alright, maybe that is too melodramatic. But it has certainly saved my sanity.


Instead of making my sauce completely from scratch, or doing the opposite and popping open a jar of sauce and heating it up, I "doctor" jarred or canned spaghetti sauce. Here is one of the variations that I often do.


Start with olive oil, add onions, mushrooms, and bell peppers and saute until softened.


Remove veggies from the pot. Add ground beef, and some Jimmy Dean ground sausage and cook until browned.

Add the veggie mix and some garlic back in. Add basil, oregano, and red pepper flakes (This is optional. Not everyone likes a kick of heat in their sauce.). Then add some wine and give it a stir. Let it simmer for a couple minutes.

This next step is VITAL! Do this next step exactly as I tell you!!!


Take the rest of the wine and pour a glass to drink. I usually use a Cabernet for my spaghetti sauces. This Dark Horse wine is a new favorite of mine.


Add a jar or can of your favorite spaghetti sauce and stir. Simmer, drink wine, simmer, drink wine...

Serve over your favorite pasta.

In case you don't want to scroll through all the photos every time you want to make this, the consolidated recipe is below.


***Ingredients***
2 Tbsp olive oil
Half an onion, diced
1 bell pepper, diced (I only had mini bell peppers on hand so that's what I used this time)
8 oz mushrooms, sliced (I am a mushroom fiend so I usually use more than 8 oz)
8 oz ground beef (I like to use 93% lean)
8 oz Jimmy Dean Sausage
1 tsp oregano
1 tsp basil
1 tsp red pepper flakes (optional)
1 cup wine
1 jar or can of spaghetti sauce

***Directions***
In a large saucepan over medium heat, add olive oil, onions, mushrooms, and bell peppers and saute until softened. Remove veggies from the pot. Add ground beef, and some Jimmy Dean ground sausage and cook until browned. Add the veggie mix back in and add some garlic. Add basil, oregano, and red pepper flakes. Then add some wine and give it a stir. Let it simmer for a couple minutes. Add your jar or can of sauce and stir. Simmer. You can simmer this for an hour, or just a few minutes, depending on how early you start it ahead of the rest of your meal. Serve over your favorite pasta.

Happy Cooking!
~Sarah Liz

Monday, June 12, 2017

Blanket of Roses


When I named my 3rd baby Angela Rose, I knew I need to make something with roses for her. I found a pattern for a rose and I made a whole mountain of them. Ok, it was just 20 roses, but it did take a while to get them all done. I did a combination of colors for this. Besides the solid colors, I did 2 of the colors with white in the middle, and the red or pink on the last row to make it look like a variegated rose. Those turned out to be my favorite of all the colors. Once I had all of the roses done, I made some pretty leaves in 2 colors to add some dimension.


The part that probably took the longest (besides actually crocheting the roses) was arranging the roses in a "random" pattern. I am just a little OCD, and I could not settle on an arrangement I liked. I finally got a good arrangement and started sewing them all together. 


It was incomplete, so I decided to make a headband. I used the same rose pattern but only did the last 2 rows to make the smaller rose for the headband. I added some ties to I could adjust it to her head.


This is still one of my favorite projects I have done. I would love to see some of your favorite projects. Tag me on instagram @craftsbysarahliz so I can connect with you!

Happy Crafting!
~Sarah Liz

Monday, May 29, 2017

Patriotic Crochet

It is Memorial Day today, so I thought I would share some of my patriotic projects that I have done over the years.

I combined a couple of patterns to make this Patriotic Wreath. I love using patterns by Repeat Crafter Me. She has a great basic pattern to cover a foam wreath. I did it in white, and added some red, white, and blue details to make it perfect for Memorial Day or 4th of July. The patterns for the details are below.


I came across this heart pattern on an old web archive and I fell in love with it. I added some stitches to make the stars of the flag to really make it look like the flag.


For the stars, I did a variation on another pattern by Repeat Crafter Me HERE. Then I slip stitched the letters on the stars. Also using this pattern, I made a star headband for my baby girl. It made a perfect patriotic accessory.

I braided some ties to hang the wreath, and my new favorite decoration piece was done! I really should do some more patriotic pieces, but with 3 kids, my time is hardly ever my own. Maybe someday.

Happy Memorial Day, and Happy Crocheting!
-Sarah Liz

Monday, May 22, 2017

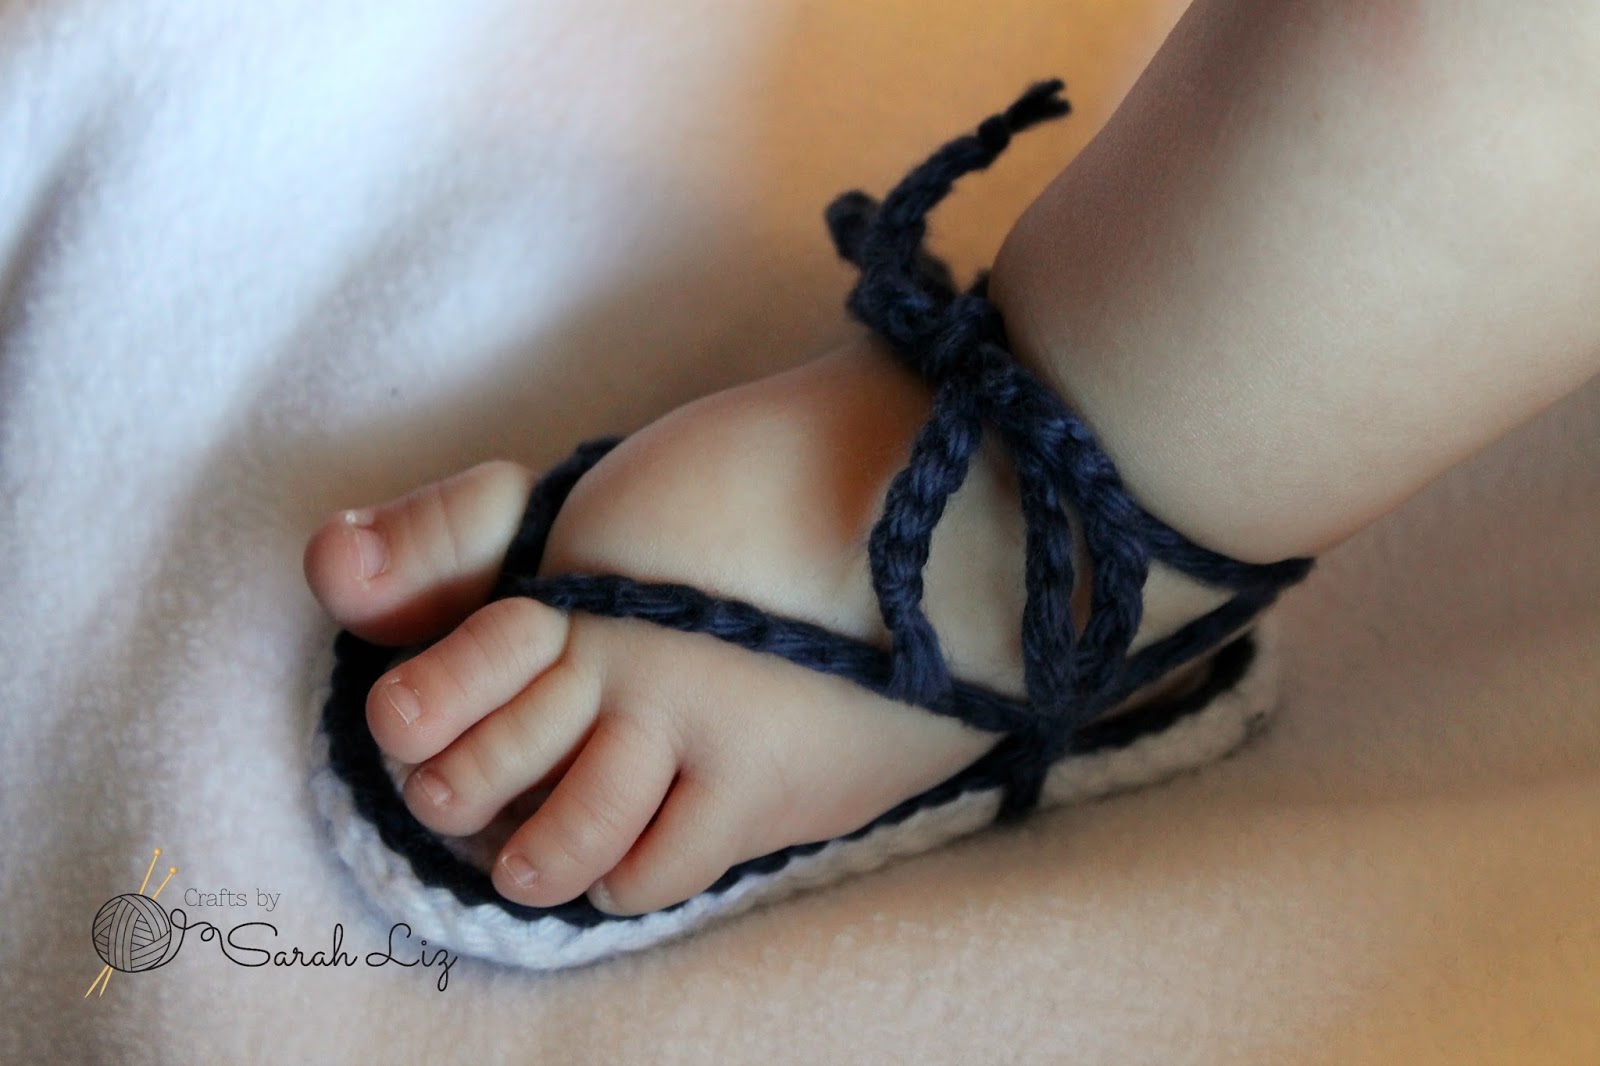
Baby Flip Flops - Crochet Pattern


Is there anything cuter than baby toes? I could just eat them up. My favorite season is summer because those sweet baby toes aren't covered up by the socks or booties that they wear in the winter. A lot of the cute sandals and flip flops wouldn't stay on my baby girl's feet so I designed my own. These feature ankle ties to help keep them on your baby's feet. And the little ties look so cute around their ankles!

Here are some of the details you will find in the pattern that is available to purchase on my Etsy shop HERE or Ravelry shop HERE:


Size:
Use hook size to adjust the pattern for multiple sizes. Based on the tightness of my tension, here is what I use:
E hook (3.5mm): 3 Months, sole is approximately 3.5 inches
F hook (3.75mm): 6 Months, sole is approximately 4 inches
G hook (4mm): 9 Months, sole is approximately 4.5 inches

Materials:
Use hook based on sizes above. Adjust hook size if your tension creates a larger or smaller sole than my gauge.
Worsted Weight Yarn (I like Caron Simply Soft or Hobby Lobby I Love This Cotton Yarn) in 2 colors.
Large eye needle for weaving in ends

Notes:
The sole is worked in a continuous spiral. DO NOT join at the end of each round.
Instructions are in US terms.


*Permissions*
- You are free to sell what you make from this pattern. I would appreciate links back to my blog to credit me as the designer.
- You may not use my photos
- You may not sell this pattern or claim it as your own

Happy crocheting!
-Sarah Liz

Tuesday, May 16, 2017

Easy Cheaty Stroganoff

I have three children 4 years old and younger. To say that I am busy is an understatement. On top of the normal crazy that three young children bring, I also run my Etsy business. Naturally, I do not have a lot of time to cook for my family. So a lot of my personal recipes are cheater recipes. I take pre-made things like a jar of spaghetti sauce, and "doctor" it up to make my dish. One of my husband's favorites is my stroganoff cheat that I am going to share with you.

-Ingredients
1 lb Ground Beef 
Half of an Onion
Sliced Mushrooms (I looooove mushrooms so I always put a lot in mine, but you can adjust it to your taste)
Splash of Worcestershire Sauce
Splash of Red Wine Vinegar
1 tsp Thyme
McCormick Stroganoff Season Packet
Beef Broth
4-8 oz Sour Cream 
-Directions
In saucepan over medium heat, saute ground beef, onion, and mushrooms until beef is browned and veggies are soft.
Add splash of Worcestershire sauce and red wine vinegar. Add thyme. Cook for an additional three minutes.
Add season packet and half a can of beef broth. Lower heat and simmer for a few minutes. Remove from heat and add 4-8 oz sour cream to taste.
Add a little bit of broth or water to get the consistency you want.
Serve over rice or noodles.

What "cheats" do you use in your cooking? I would love to hear about your shortcuts.

Happy Cooking!
-Sarah Liz

Monday, May 8, 2017

Lacy Baby Headband - Free Knitting Pattern


I first opened up my Etsy shop with some baby headbands and booties. The headbands were a little knitting pattern I developed in my own head. I feel like it is time to write it down and share it with you. See pattern below, or you can download a pdf version on my Ravelry store HERE.

-Materials
Size 3 knitting needles
Worsted Weight yarn (I used Caron Simply Soft)
Scissors
Needle for weaving in ends

-Abbreviations
CO - cast on
RS - right side
WS - wrong side
K - knit
P - purl
YO -yarn over
K2TOG - knit 2 together
BO - bind off

-Gauge
20 sts, 44 rows, garter stitch = 4"

-Sizes
Instructions are for 0-3 months with (3-6 months, 6-9 months) in parenthesis.

-Pattern
Using thumb method, CO 72 (80, 88) sts.
Row 1. WS - Knit across
Row 2. RS - Knit across
Row 3. WS - K 2 sts, *yo, k2tog*. Repeat * * until 2 sts from the end. K 2 sts.
Row 4. RS - Knit across
Row 5. WS - K 1 st, *yo, k2tog*. Repeat * * until 1 st from the end. K 1 st.
Row 6. RS - Knit across
Row 7. WS - K 2 sts, *yo, k2tog*. Repeat * * until 2 sts from the end. K 2 sts.
Row 8. RS - Knit across
Row 9. WS - Knit across
Row 10. RS - BO using a loose bind off or you can use the alternate bind off below
Alternate Bind Off - Elizabeth Zimmermann's sewn bind off HERE.

-Finishing
Using needle, sew ends together. Attach your favorite flower or bow at the seam to help hide where you sewed it together. See below for my favorite flower pattern to go with this headband.

-Crochet Flower Pattern
I modified a version of this pattern HERE

Using G hook (4mm)
Ch 4 (Magic circle does not work with this flower pattern)
Sl st in 1st chain to form a circle
Prep: Ch 1
Round 1. *Ch 3, sc in circle* Repeat 3 more times (you will have 4 loops at this point). Ch 3, sl st into Ch 1 in prep round (now you have 5 loops)
Round 2. In first ch 3 loop, (sc, ch 1, 3dc, ch 1, sc). Repeat in the rest of the loops. Join to the first sc of the first petal.
Round 3. Fold the petals toward yourself so you can work behind them to make the next layer of the flower. Still working in the circle made from the ch 4 at the beginning, *sc, ch 4*. Repeat 3 more times (you will have 4 loops at this point). Ch 4, sl st to first sc. (now you have 5 loops)
Round 4. In the first ch 4 loop, (sc, hdc, dc, 3 tr, dc, hdc, sc). Repeat in each ch 4 loop around. Join with sl st to the first sc of the first petal of the round. Cut yarn leaving a long tail for sewing to headband.

-Finishing
Sew a pretty button in the center of your flower. Sew the flower to the headband, weaving in any remaining ends.

I would love to see your headbands! Tag me on instagram @craftsbysarahliz so I can see your work!


*Permissions*
- You are free to sell what you make from this pattern. I would appreciate links back to my blog to credit me as the designer.
- You may not use my photos
- You may not sell this pattern or claim it as your own

© Sarah Gross - Crafts by Sarah Liz