Monday, April 6, 2020

Flower Child Collection - Free Crochet Pattern #3

The third and final pattern in the Flower Child Collection is the original headband pattern that I created. I am sharing it for free for the first time since I published it for sale three years ago. It has been one of my most popular items on my Etsy shop because it works for babies, children, and adults. You can find the written instructions below. You can also find the full photo tutorial in the E-book on my Ravelry.

Photo by Mae Batista Photography
Materials:
C Hook (2.75 mm)
Aunt Lydia’s Crochet Cotton size 10
(I like to use white and yellow)
Scissors
Large eye needle for weaving in ends

Abbreviations:


Ch - chain
Sc - single crochet
Dc - double crochet
Sl st - slip stitch
RS – right side
WS – wrong side

Notes: 
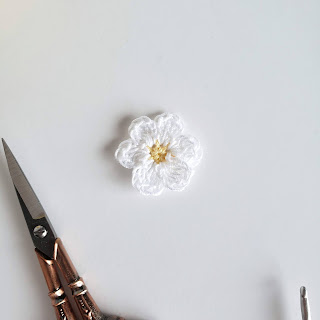
Based on my tension, each flower measures approximately 1 inch. From the 1st flower to the 10th, the headband measures approximately 10 inches, with 10.5 inch ties on either side. By switching up your hook and/or yarn, or even the number of flowers, you can adjust the size of the whole headband.
Instructions:

1.  Ch 70, DO NOT cut the white thread.
2.  Join yellow thread, and ch1. Again, DO NOT cut the white thread.
3.  Sc 6 in last white chain.
4.  Join with sl st to first sc. Cut yellow thread leaving a couple inches for weaving in. Join white thread at the place where you joined the sc’s together.
5.  Ch 2, 3 dc in same st as join. Ch 2, sl st in same st. Sl st into next sc.
6.  Repeat step 5 until you have 6 total petals. Join with sl st to first petal.
7.  Ch 7
8. Repeat steps 2 through 6.
9. Keep repeating steps 2 through 6 with 7 chains in between each flower. After the 10th flower, ch 70 to make the other tie.

Finishing:
Knot the ends of the ties right at the last chain of each tie. I use the yellow ends on each flower to secure down the flowers in place. Weave in the yellow ends. 


Click on these links for the other two patterns in this series:

I would love to see your Flower Child projects! Tag me on Instagram  @craftsbysarahliz so
I can see your work!

I hope you enjoy my pattern. Your support of my small business is truly appreciated!

*Permissions*
- You are free to sell what you make from this pattern. I would appreciate links back to my 
blog, Ravelry, or Etsy shop to credit me as the designer.
- You may not use my photos.
- You may not sell this pattern or any part of this pattern, distribute it, or claim it as your 
own.
© 2020 Sarah Gross - Crafts by Sarah Liz

Flower Child Collection - Free Crochet Pattern #2

Pattern number two of my Flower Child Collection is the bracelet. I made this recently, and my daughter immediately asked if it was for her. The pattern is adjustable so you can make it any size that you want, which is especially handy when your child asks for one.

Don't forget, you can buy the E-book with all three patterns and full step-by-step photo tutorials on my Ravelry.

Materials:
C Hook (2.75 mm)
Aunt Lydia’s Crochet Cotton size 10
(I like to use white and yellow)
Scissors
Large eye needle for weaving in ends
Jewelry Pliers
Jewelry Clasps
2 small jump rings


Abbreviations:
Ch - chain
Sc - single crochet
Dc - double crochet
Sl st - slip stitch
RS – right side
WS – wrong side

Notes: 
Based on my tension, each flower measures approximately 1 inch. I did 5 flowers total and with the chains in between and on the ends, it measures approximately 6.5 inches. By switching up your hook and/or yarn, or even the number of flowers, you can adjust the size of the whole bracelet.

Instructions:
    1.        With yellow thread, make magic ring. Ch 1, sc 6 sts in magic ring. Join with sl st to first sc to work in the round.

2.       Cut yellow thread leaving a couple inches for weaving in. Join white thread at the place where you joined the sc’s together.

3.       Ch 2, 3 dc in same st as join. Ch 2, sl st in same st. Sl st into next sc.

4.       Repeat step 3 until you have 6 total petals. Join with sl st to first petal.

5.       Ch 7 sts, and join yellow thread. Do NOT cut white thread.

6.       Ch 1, and sc 6 sts into the ch. Sl st to first sc to join. 


Now repeat steps 2-4 to make another flower. 

Repeat until you have the desired number of flowers.

7.        When you have made the last flower, Ch 6 and sl st in the 2nd ch from the hook, and each remaining ch. Sl st to flower.   
8.       Join yarn to first flower on the other side, and repeat step 7.
Weave in all ends.

9.       Using jewelry pliers, open jump ring and put it through one of the ends of the bracelet, and one side of the clasp.

Repeat step 9 on the other side of the bracelet.
Click on these links for the other two patterns in this series:

I would love to see your Flower Child projects! Tag me on Instagram  @craftsbysarahliz so
I can see your work!

I hope you enjoy my pattern. Your support of my small business is truly appreciated!

*Permissions*
- You are free to sell what you make from this pattern. I would appreciate links back to my 
blog, Ravelry, or Etsy shop to credit me as the designer.
- You may not use my photos.
- You may not sell this pattern or any part of this pattern, distribute it, or claim it as your 
own.
© 2020 Sarah Gross - Crafts by Sarah Liz


Flower Child Collection - Free Crochet Pattern #1

I have an exciting collection of patterns today. A few years ago I published the Flower Child Headband pattern for sale. I have played around with daisies ever since, and now I am making the Flower Child Headband available for free on my blog, as well as two new patterns featuring the daisy. You can also find the E-book containing all 3 patterns and even more step-by-step tutorials available for purchase on my Ravelry. I will be sharing the three patterns in separate blog posts so you can easily save your favorites to Pinterest.

The first pattern I am sharing is the Earring Pattern. It features a single daisy on a fishhook earring. 


Photo by Mae Batista Photography
Materials:
C Hook (2.75 mm)
Aunt Lydia’s Crochet Cotton size 10
(I like to use white and yellow)
Scissors
Large eye needle for weaving in ends
Jewelry Pliers


Fishhook Earrings


Abbreviations:
Ch - chain
Sc - single crochet
Dc - double crochet
Sl st - slip stitch
RS – right side
WS – wrong side 

Notes:
Based on my tension, each flower measures approximately 1 inch. You can use a larger or smaller hook to make your earrings the size you would like.


INSTRUCTIONS

1.       With yellow thread, make magic ring. Ch 1, sc 6 sts in magic ring. Join with sl st to first sc to work in the round. 

2.       Cut thread leaving a couple inches for weaving in. Join white thread at the place where you joined the sc’s together.


3.       Ch 2, 3 dc in same st as join. Ch 2, sl st in same st. Sl st into next sc.


4.       Repeat step 3 until you have 6 total petals. Join with sl st to first petal.


5.        Cut yarn, and weave in ends.
6.        Using jewelry pliers, open the loop on the end of the earring and attach it to the middle DC of one of the petals. Use pliers to close the loop.

7.        Repeat all steps again for the 2nd earring.

Click on these links for the other two patterns in this series:

I would love to see your Flower Child projects! Tag me on Instagram  @craftsbysarahliz so I can see your work!

I hope you enjoy my pattern. Your support of my small business is truly appreciated!

*Permissions*
- You are free to sell what you make from this pattern. I would appreciate links back to my blog, Ravelry, or Etsy shop to credit me as the designer.
- You may not use my photos.
- You may not sell this pattern or any part of this pattern, distribute it, or claim it as your own.

© 2020 Sarah Gross - Crafts by Sarah Liz